Training

Writer Training / Amends

IMPORTANT:  The Dynamic Row can only be added to a site post proof, if indicated on the questionnaire for initial build do not add to website. Add an assumption.

  1. Identify questionnaire Insites (Dynamic Row) content.
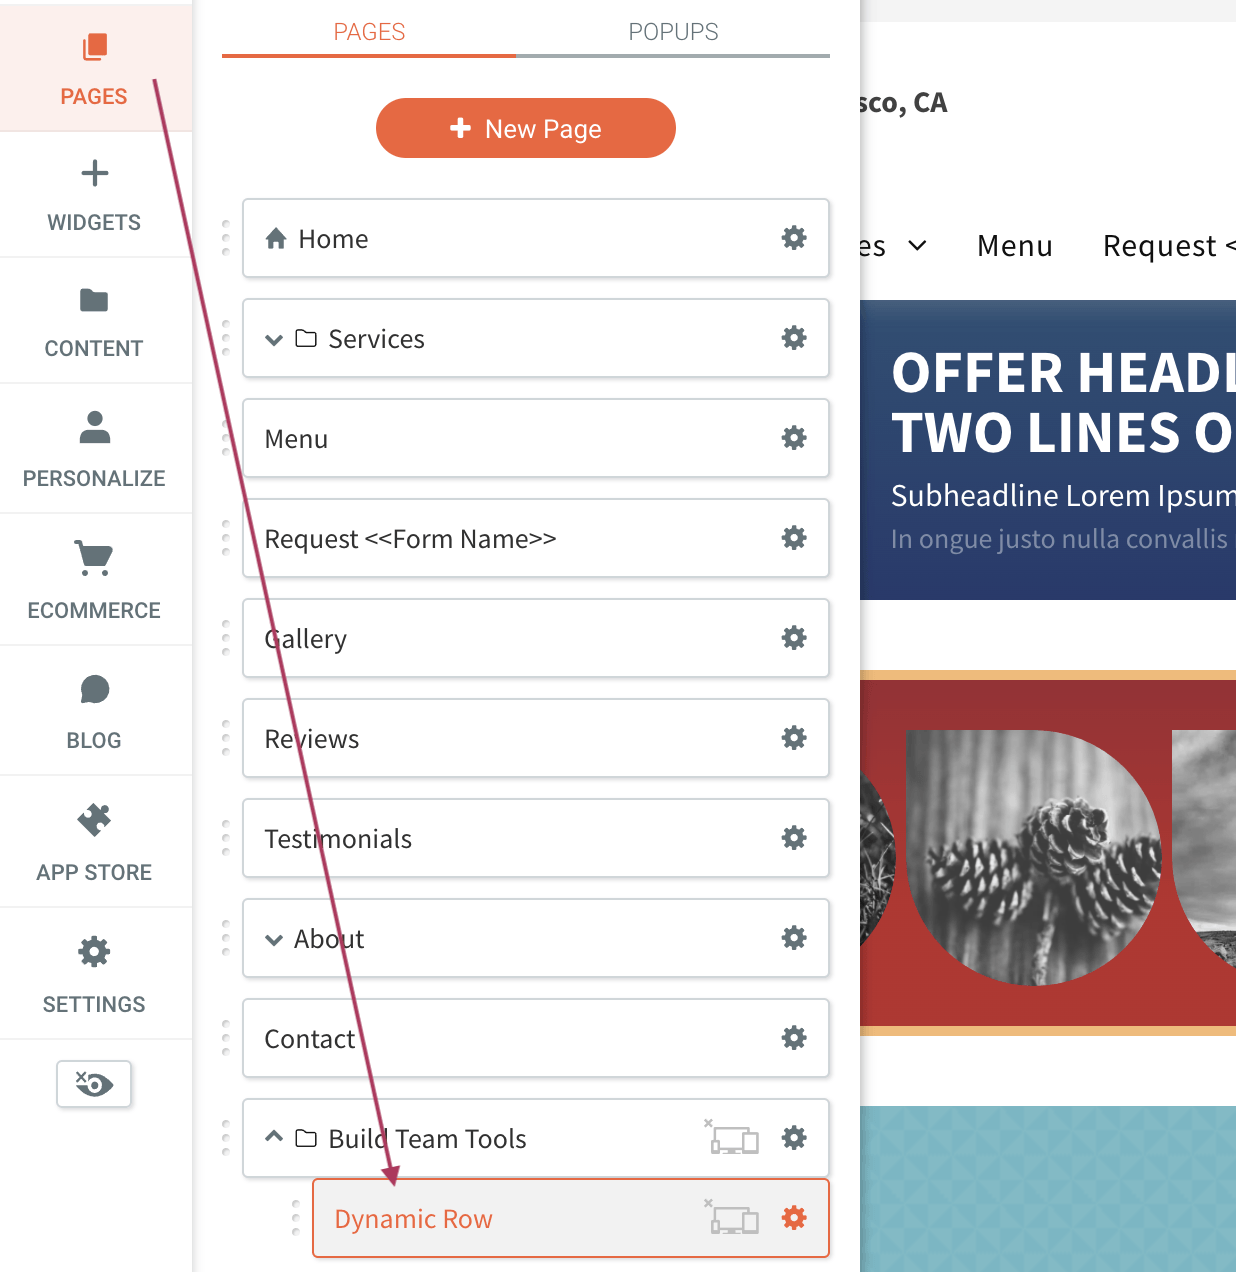
  1. In the side panel of the editor, click Pages, locate hidden Build Team Tools, and open the Dynamic Row page.

  1. Identify the Dynamic Row design that best meets provided client content and time period.

  2. Overwrite text with provided questionnaire content using title case.  

IMPORTANT:  The Dynamic Row must include  a defined specific period of time.  If included Time / date / Duration for offer to display does not meet requirement do not add Dynamic Row and leave assumption that instructions were incomplete.

Note:  If applicable, replace phone with RCF.  

Hint:  The writer is permitted to edit and rewrite copy to better the overall user experience.   Approach writing Dynamic Row copy as if it were a callout

  1. When finished exit Dynamic Row page to continue writing site copy.  

Artist Training

  1. In the side panel of the editor, click Personalize.
  2. Click the gear icon to the right of the greyed out Dynamic Row rule and select Activate to "turn on" the rule.
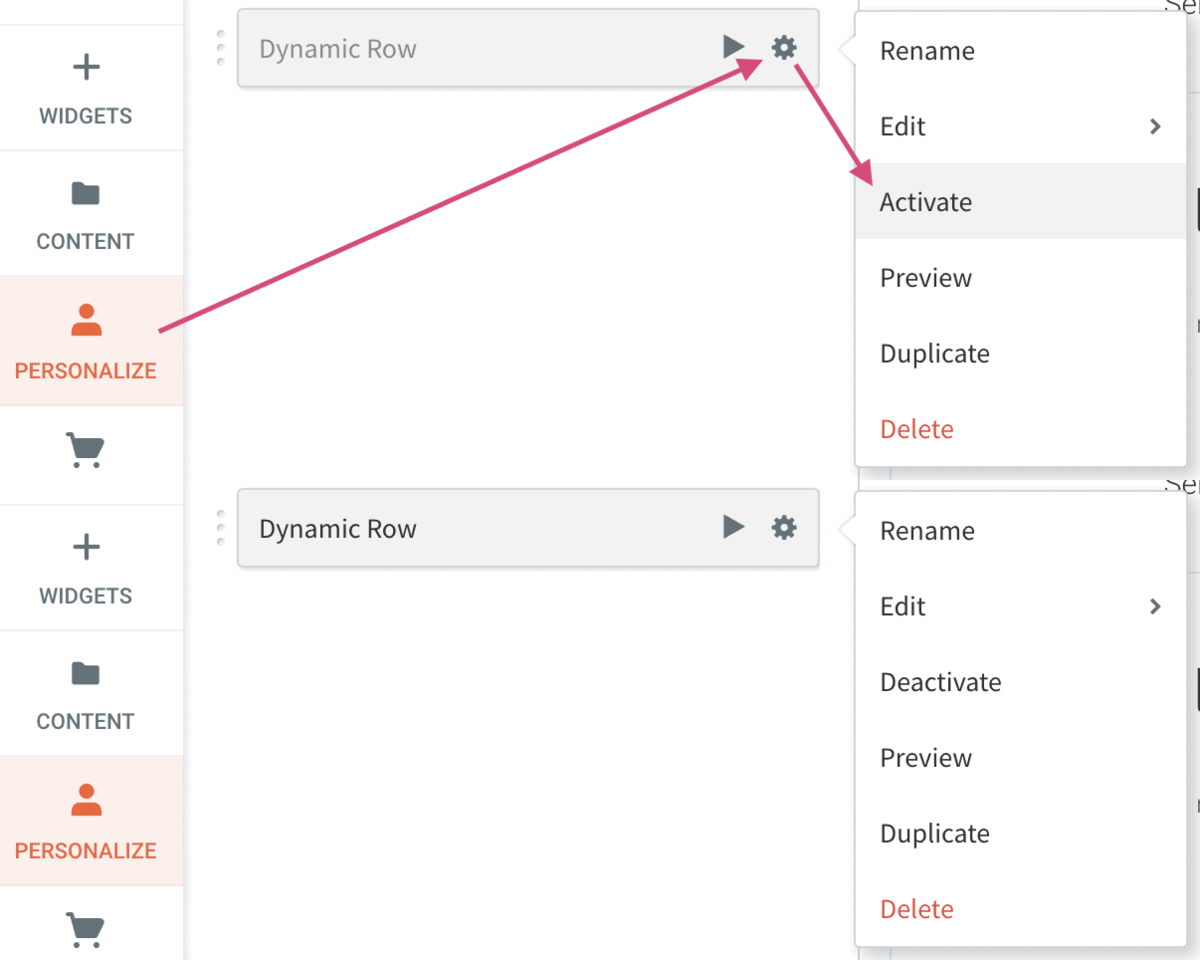
  1. Select Edit, then Edit Trigger

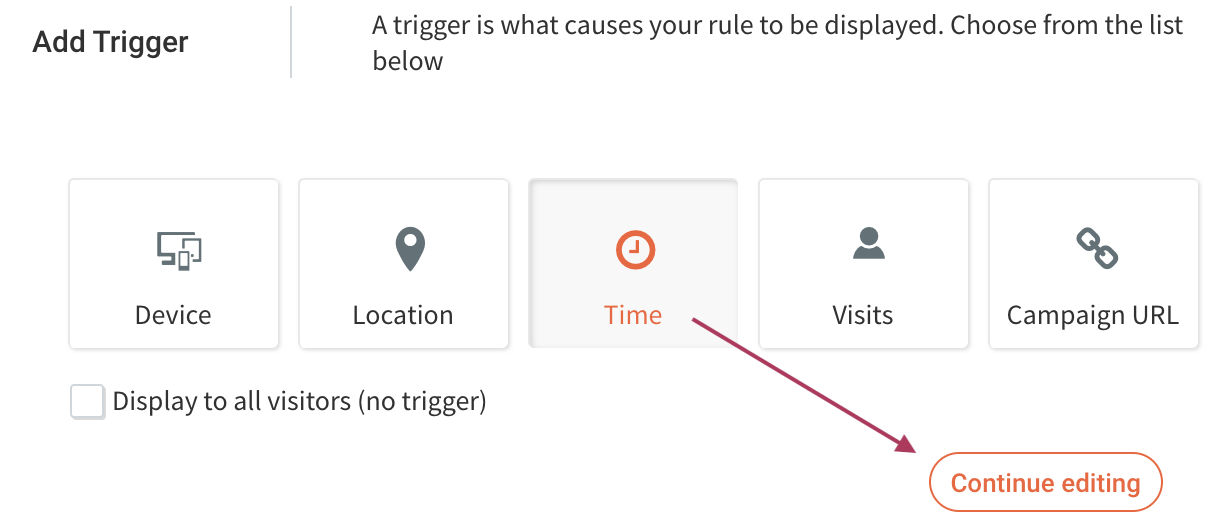
  1. Select Time trigger, then Continue editing

  1. Update Event Details to match client-defined Time Period

  • Examples
  • Weekend run - 12:00 am Saturday to 11:59 pm Sunday
  • Weekday run - 11:00 am to 2:59 pm Monday to Friday
  • After Hours run
  • May include multiple time periods if business is closed on weekends
  • Monthly run - 12:00 am Sept 1 to 11:59 pm September 30
  • Quarterly run - 12:00 am Oct 1 to 11:59 pm December 31
  • DOUBLE CHECK start and stop dates / time
  1. In the side panel of the editor, click Pages, locate hidden Build Team Tools, and open the dynamic Row page.

  1. Identify the Dynamic Row that the copywriter edited.

  2. Hover over the content to reveal the blue Inner Row prompt.

  3. Right-click Inner Row and copy.

  1. Return to Personalize --> Dynamic Row rule --> Edit --> Edit trigger

  2. Click the orange Continue editing button twice to edit the dynamic row in the editor. You may need to scroll up to reveal the red row.

  1. Hover over the Paste Dynamic Row Design to paste the copied Dynamic Row design (Step 9).

  2. Delete Paste Dynamic Row Design place holder container.

  3. Click far left ROW--> Edit Design to apply background color / gradient.

  4. Update icon(s) or image(s).

  5. Update CTA button or text.

  6. Review in mobile.  Adjust accordingly.

  7. Click DONE when finished editing.

Share by: